
How to Block Downloads from Specific SharePoint Sites Using Conditional Access


Modern collaboration tends to involve contractors, partners, and other external users that need access to your SharePoint content. At the same time, organizations have to make sure that sensitive information remains protected, even when it's being accessed outside of managed corporate devices.
With Zero Trust, a core concept is that authenticating a user doesn't automatically convey trust in the device they're using. Users may have a legitimate business need to access a SharePoint site, while the device they're using may still be unmanaged or otherwise outside your organization's control.
In those situations, allowing users to view documents while preventing them from downloading local copies can significantly reduce the risk of sensitive information leaving your managed environment.
Microsoft offers multiple approaches for restricting downloads from SharePoint sites, but the right solution depends on your organization's requirements and licensing. In this article, we'll use Authentication Contexts and Sensitivity Labels, to apply these restrictions precisely where they make sense, instead of everywhere, all at once. This allows you to tighten the control on an especially sensitive executive site or HR site, without unnecessarily restricting collaboration across the rest of the tenant.
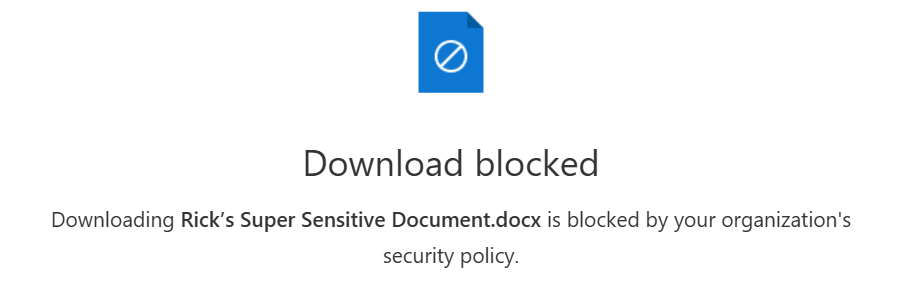
This solution
This guide walks through the complete configuration, explains how the individual components work together, and highlights some of the common pitfalls that can prevent the policy from working as expected. The configuration itself isn't particularly difficult. Understanding how the pieces fit together is usually the harder part.
✅ Users can continue accessing SharePoint sites from unmanaged devices.
✅ Documents remain viewable using Office for the web.
✅ File downloads are blocked.
✅ Restrictions apply only to selected SharePoint sites.
✅ Other SharePoint sites remain unaffected.
Prerequisites
- Microsoft Entra ID P1/P2 licensing
- Microsoft Purview
- Microsoft Defender for Cloud Apps
- SharePoint Online
- Global Administrator / Security Administrator permissions
If your tenant hasn't previously been configured for container sensitivity labels, complete Microsoft's one-time enablement procedure before continuing. It's worth checking to see if someone has already configured it. You may also find that if your tenant is new enough, it might be set up by default. If not: https://learn.microsoft.com/en-us/purview/sensitivity-labels-teams-groups-sites#enable-this-preview-and-synchronize-labels
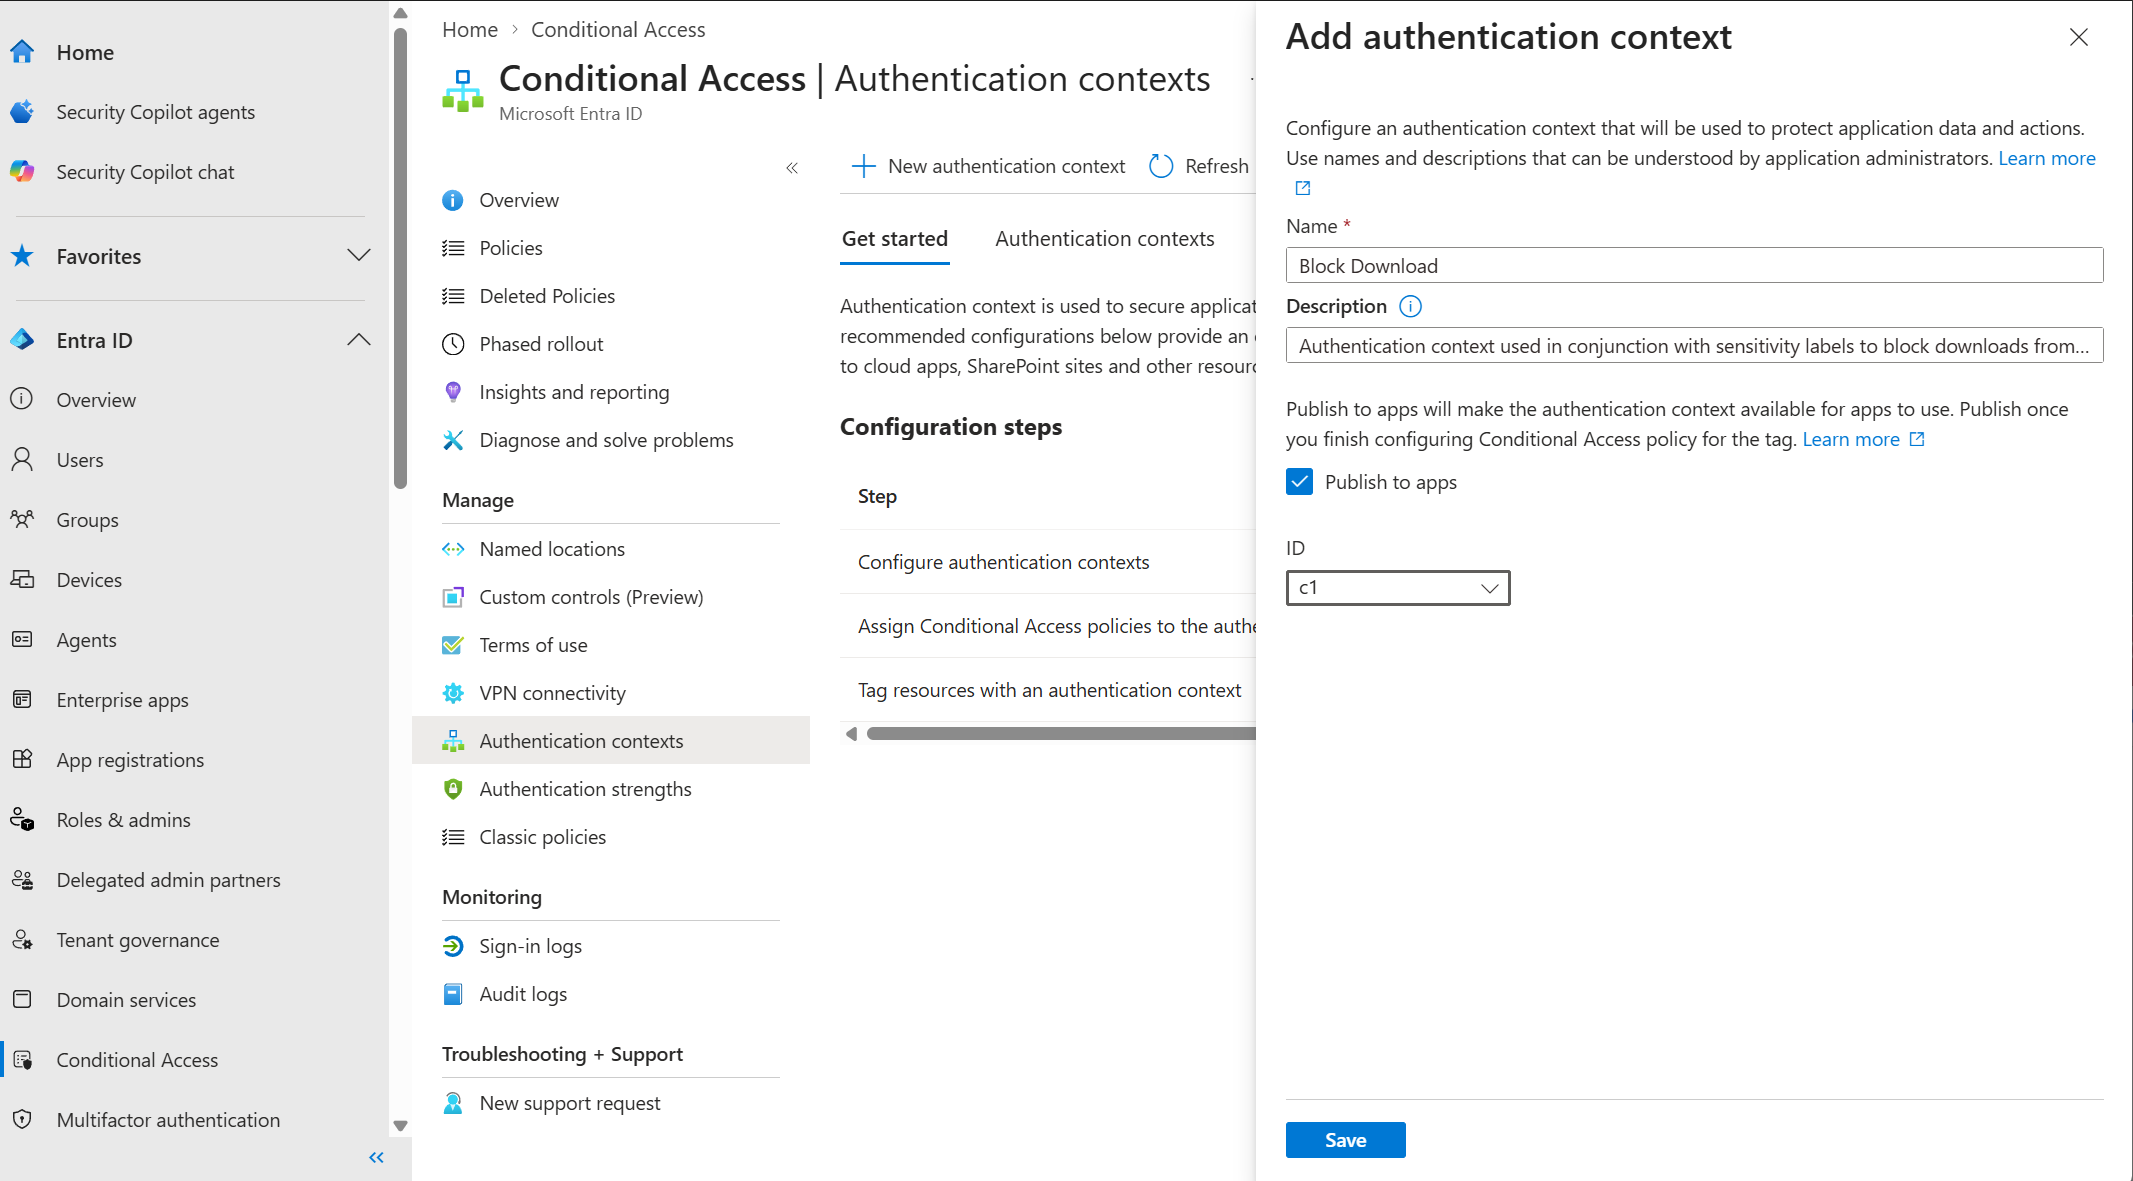
Step 1. Create an Authentication Context
- Create "New Authentication Context"
- Name it, provide description and click "Save"
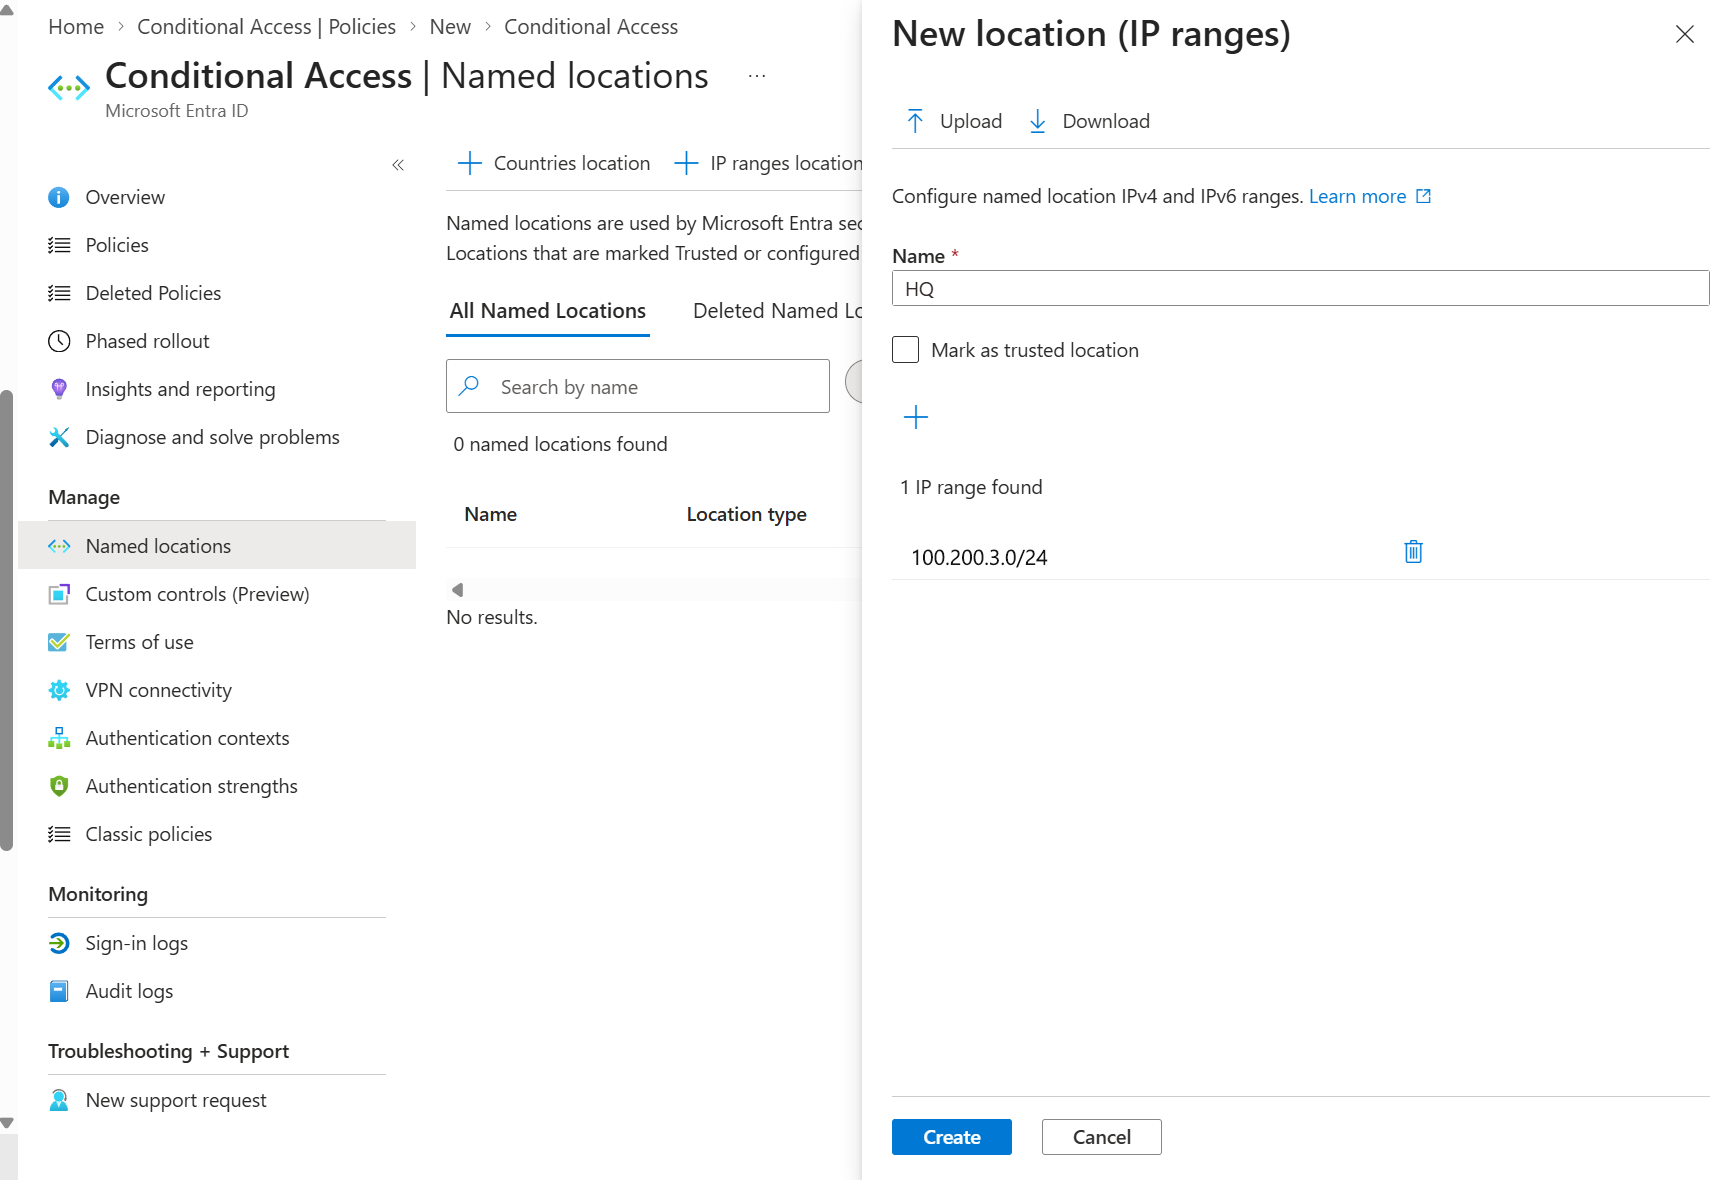
Step 2. Create (or verify) a Named Location
In this scenario, we're using the IP scheme of corporate networks to determine whether a download will be permitted on sites that are assigned the label later on.
- Click "+ IP ranges location"
- Name it, provide IP range. description and click "Create". If this isn't something you've already done, you'll need to document your organization's networks before they can be referenced by this policy. Network ranges should be entered in CIDR notation (for example,
192.168.1.0/24), adjusting the subnet mask as appropriate.
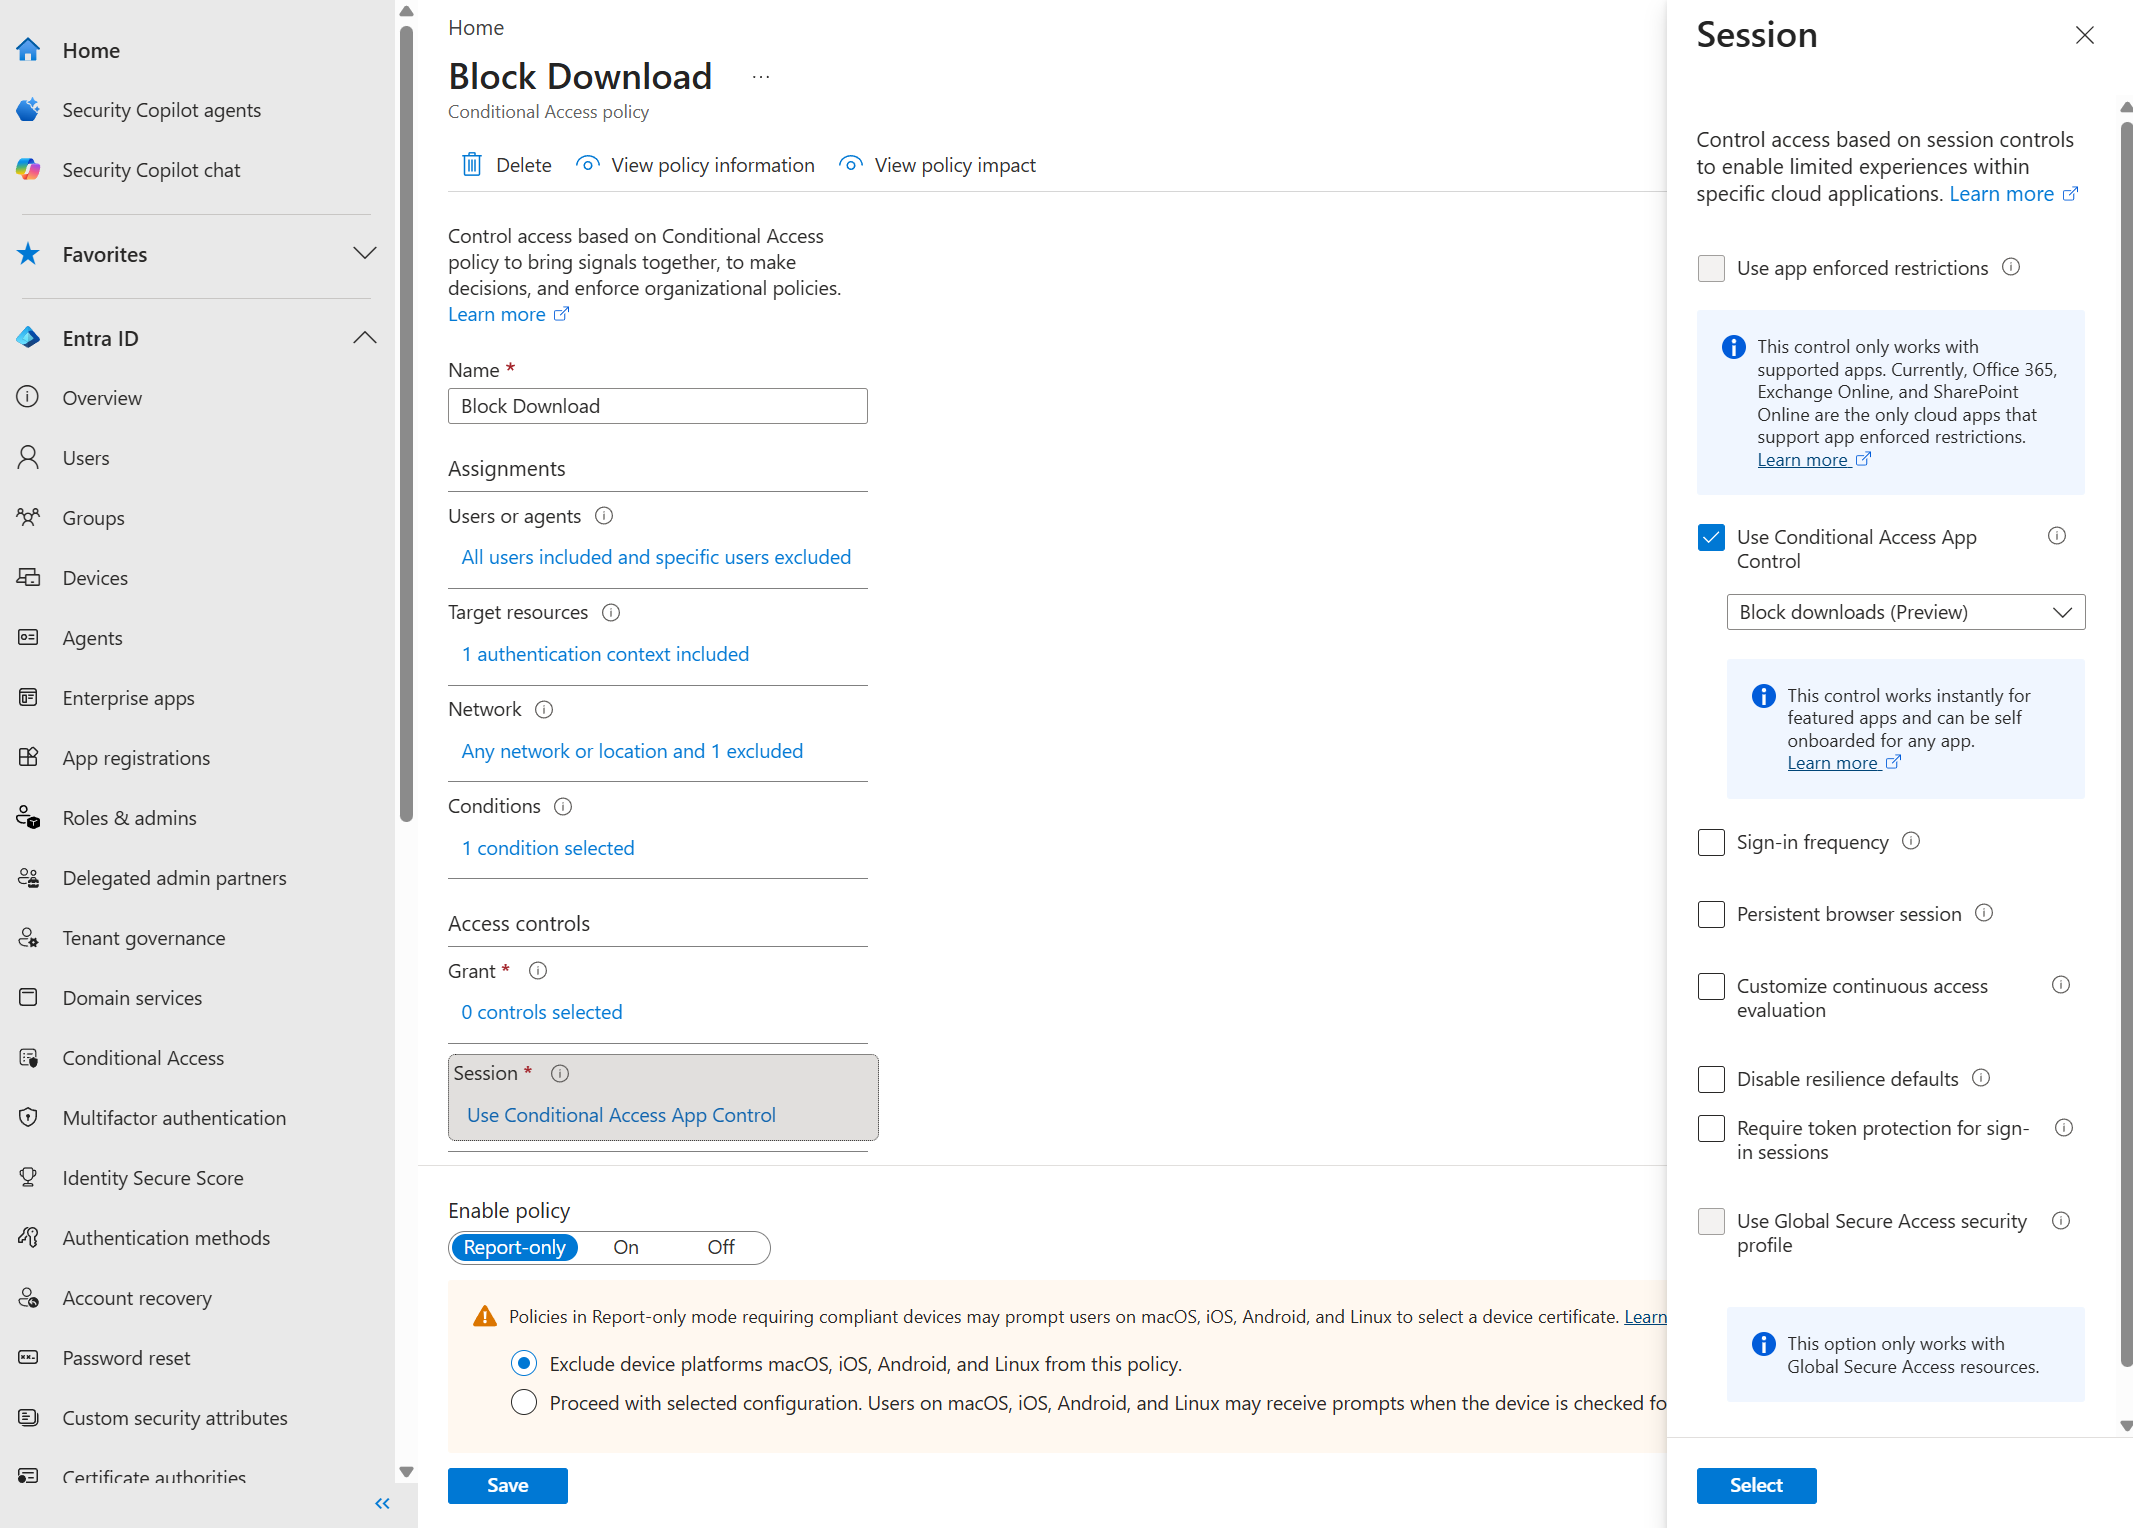
Step 3. Create Conditional Access Policy
- Click "+ New Policy"
- Name: Enter the name
- Assignments: Select "All users". You can (and should) exclude your break glass accounts here.
- Target resources: Select your newly created authentication context.
- Network: Select "Yes" to configure and then select "Any network or location". Then click over to the "Exclude" tab. Choose the option for "Selected networks and locations" and then pick your network(s) from the "select" option, lower in the panel.
- Session: Check the box for "Use Conditional Access App Control" and then select "Block Downloads (Preview)" from the drop down. Click the select button at the bottom of the pane to finish.
When you're done, click the "Save" button. As always, its usually a good idea to run new conditional access policies in "Report only" mode until you are able to validate impact. Once you're content with where & why you're seeing it apply, move it to the "On" state.
Step 4. Create Sensitivity Label
- Click "+ Create", then select "Label"
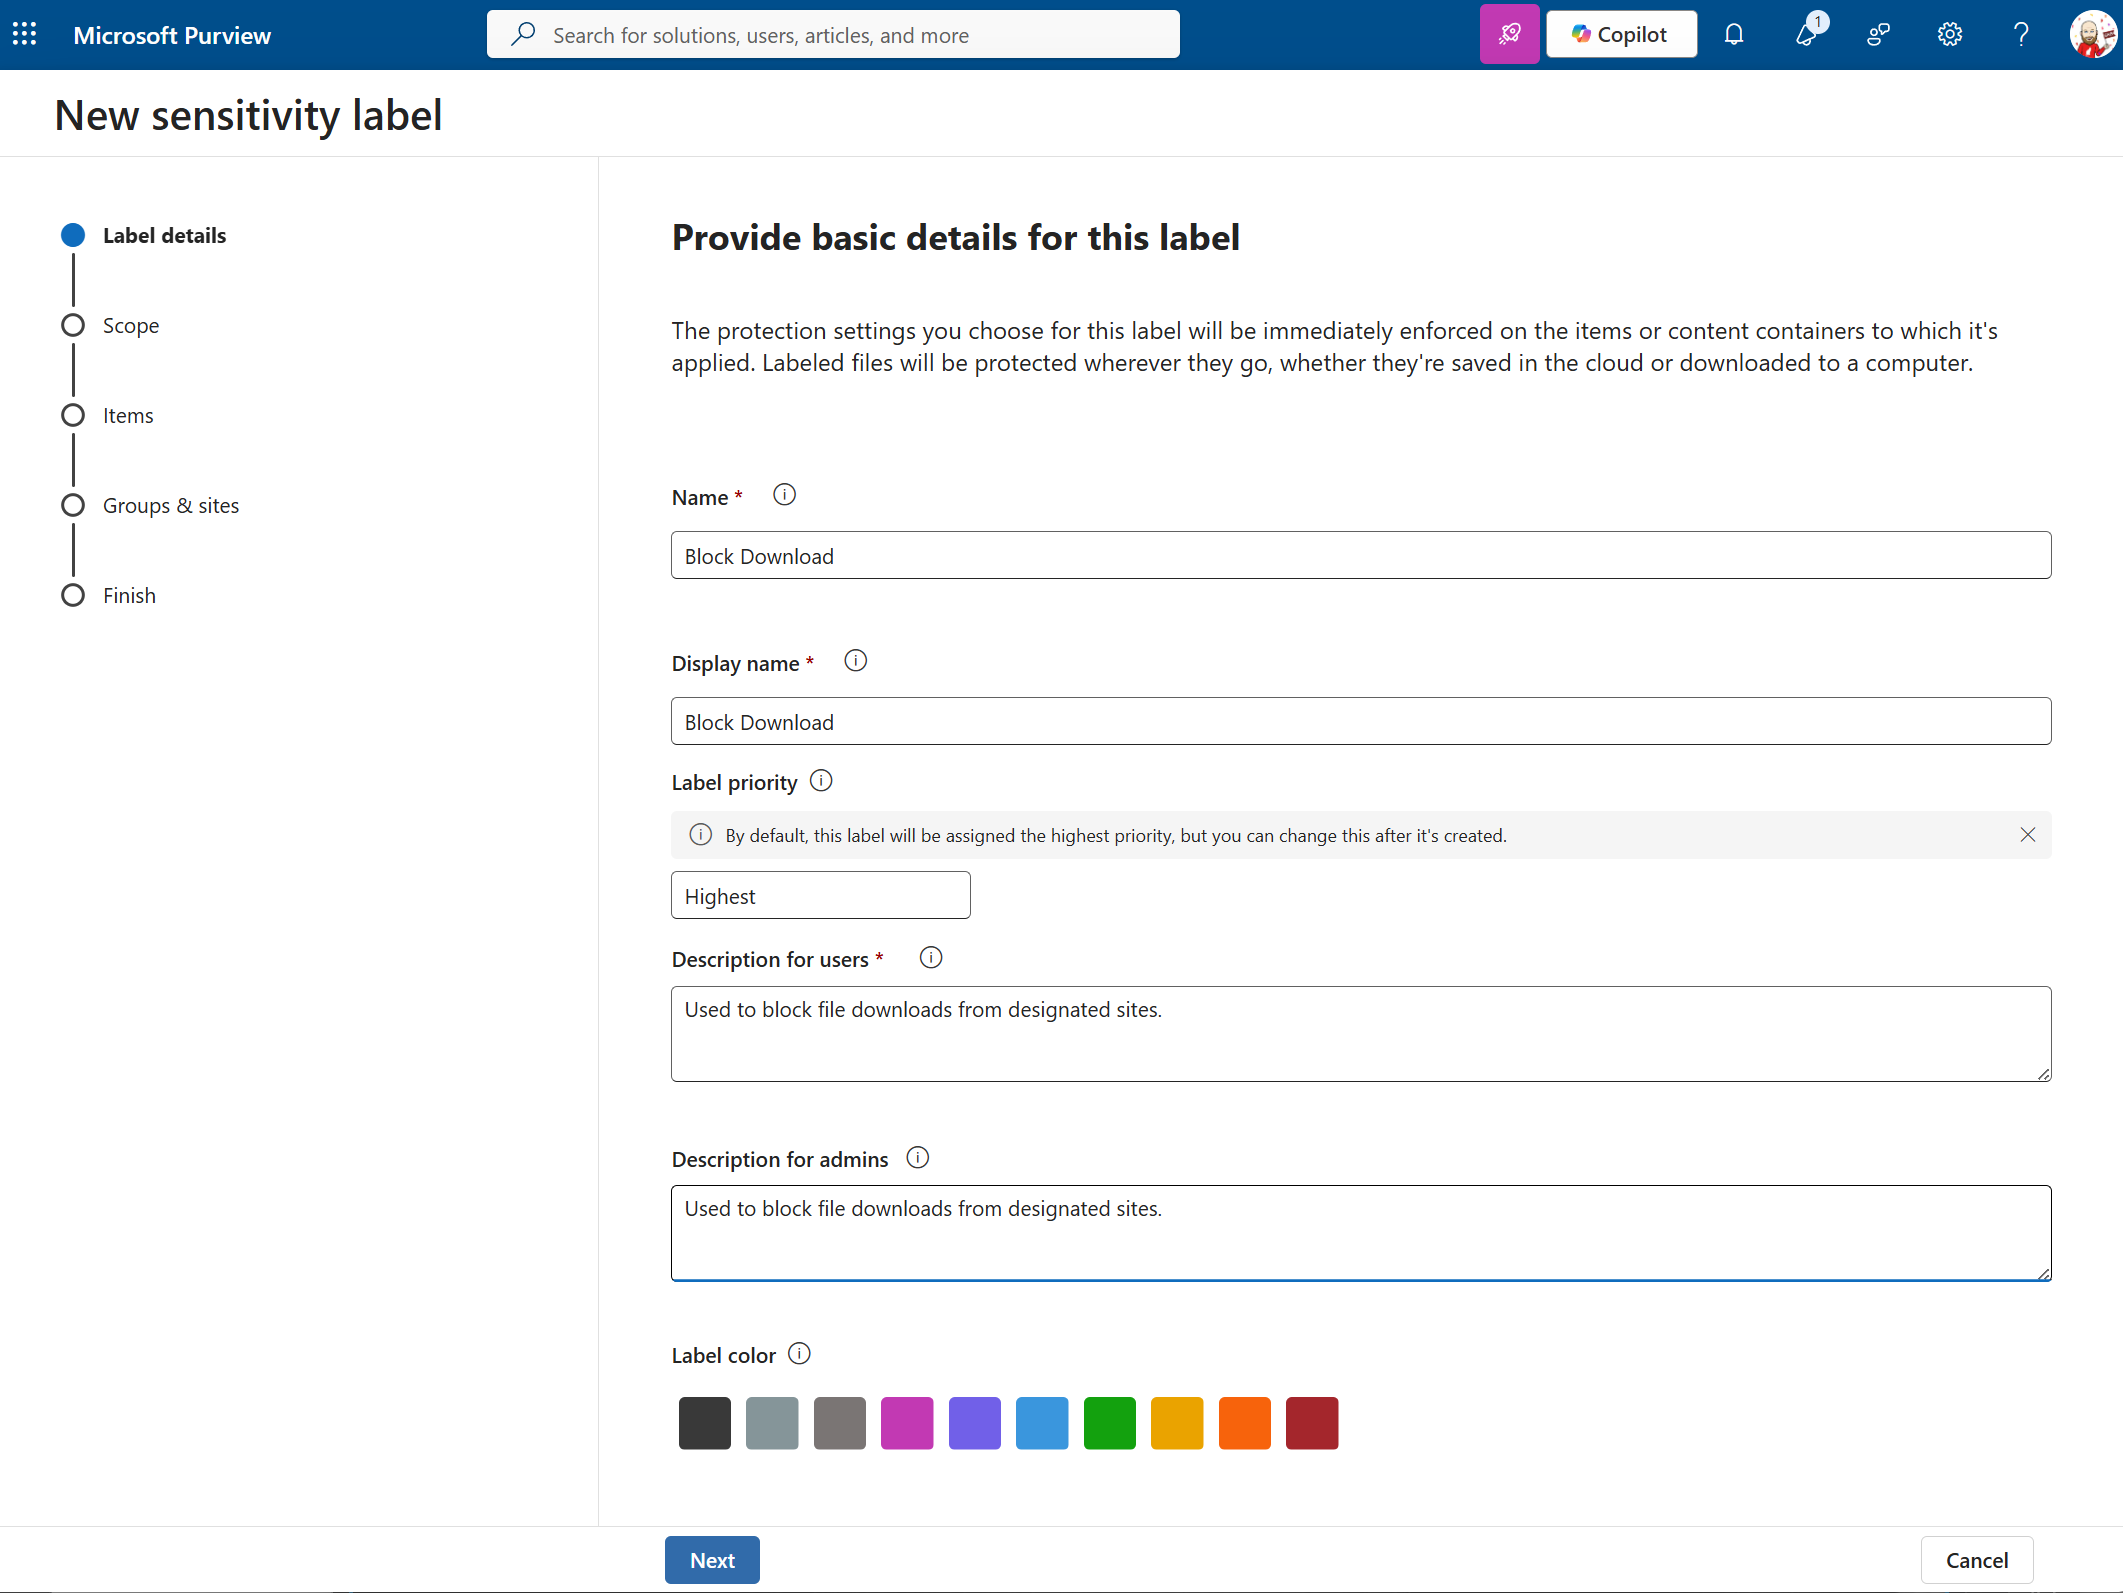
- Enter the name, display name and descriptions.
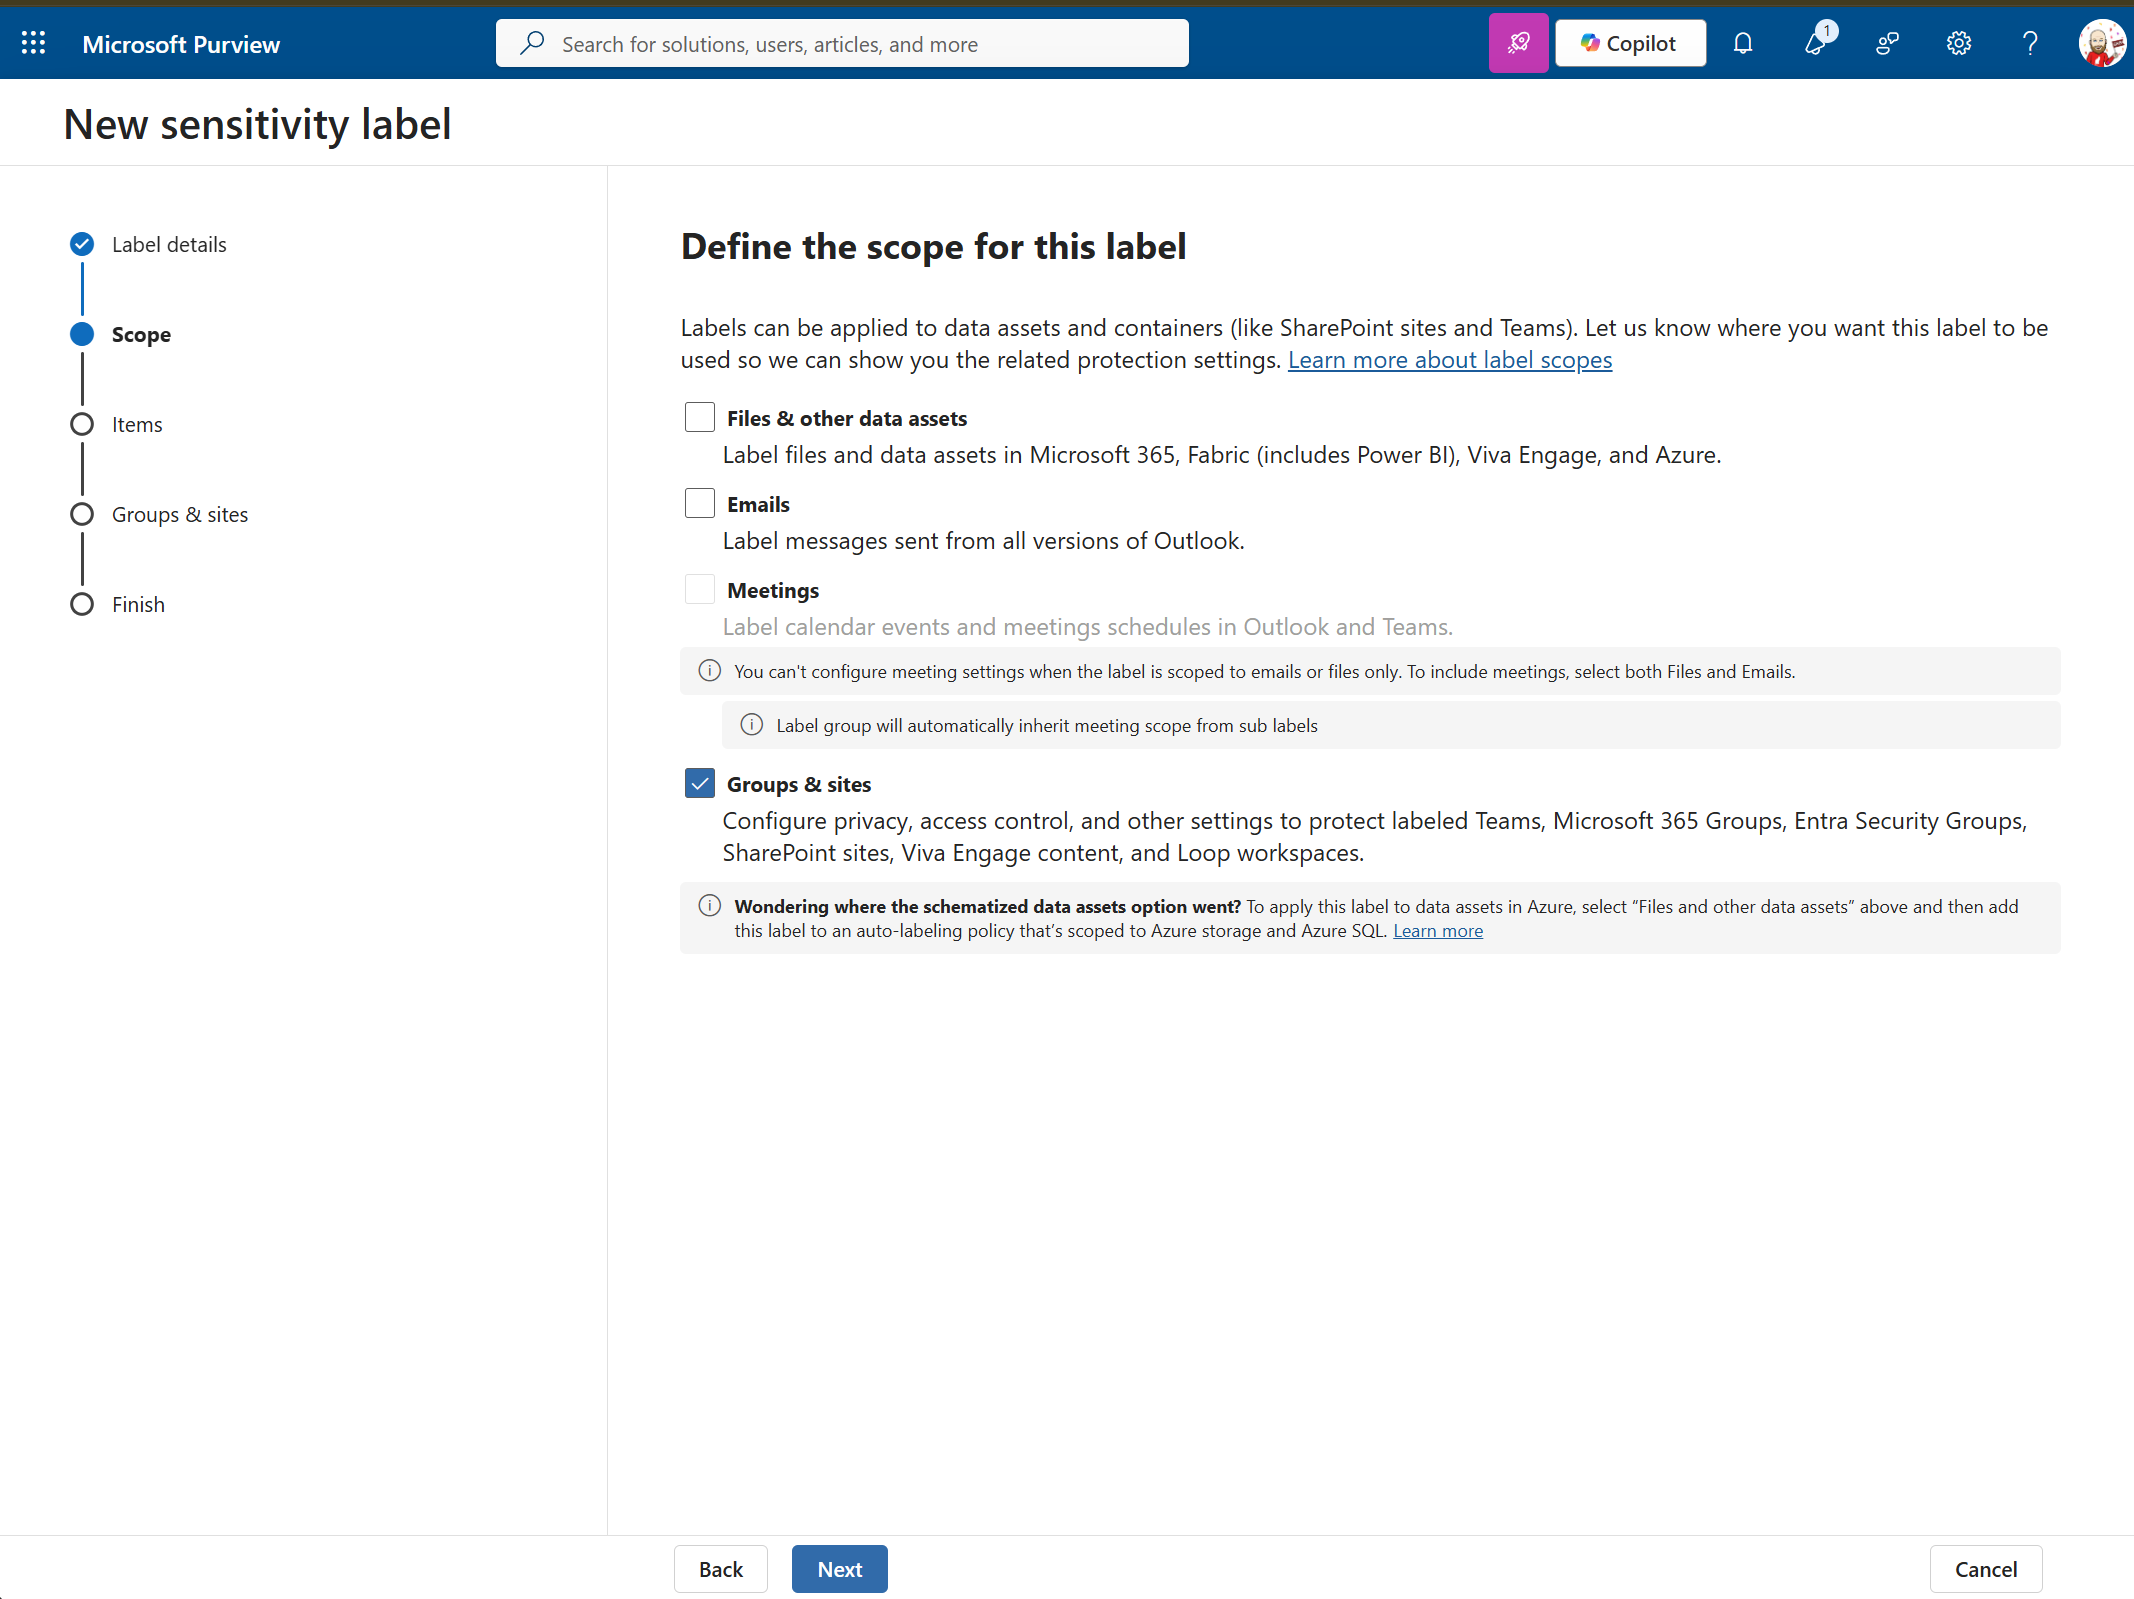
- Remove the checks for everything except "Groups and sites". If this box isn't selectable for you, you still have to configure your tenant to allow labels on SharePoint sites: https://learn.microsoft.com/en-us/purview/sensitivity-labels-teams-groups-sites#enable-this-preview-and-synchronize-labels
- Leave the defaults on the "Choose protection settings for the types of items you selected" screen and click "Next".
- On the "Define protection settings for groups and sites screen", select "External sharing and Conditional Access"
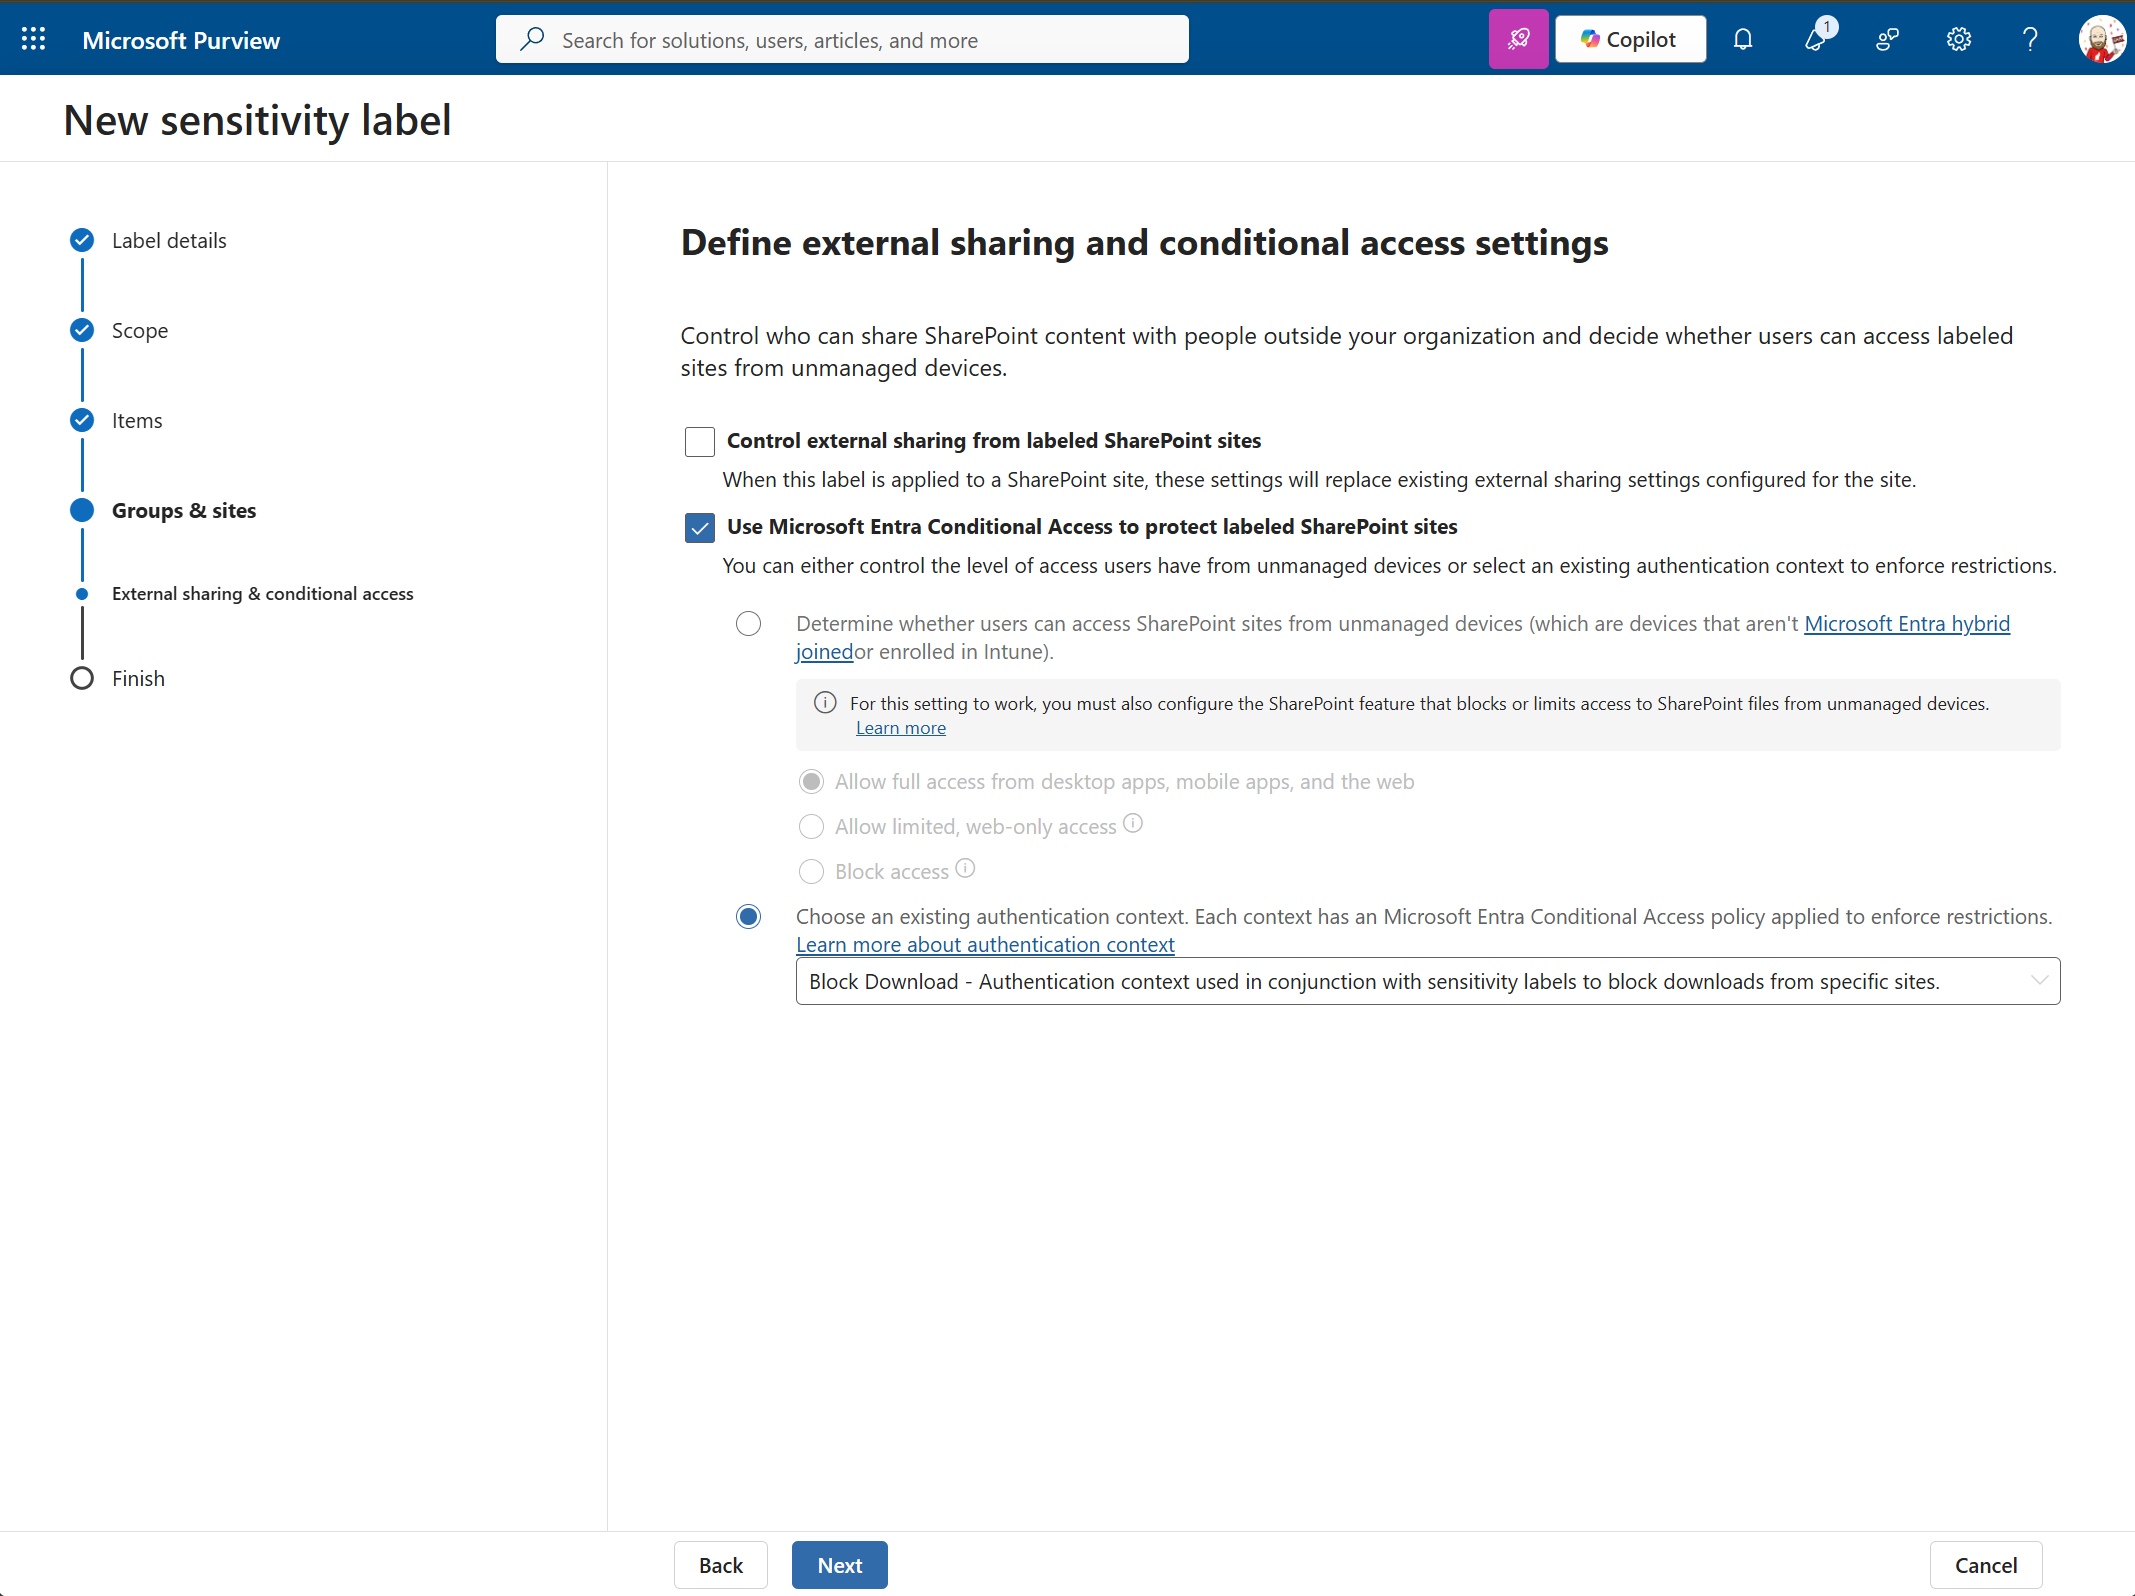
- Next, on the "Define external sharing and conditional access settings" screen, pick the second option "Use Microsoft Entra Conditional Access to protect labeled SharePoint sites".
- On the review screen, click the "Create label" button.
Step 5. Publish Sensitivity Label
- Click the 3-dot ellipsis menu for your new label and select "Publish label".
- Click through the remaining screens. The default values are fine, adjust as necessary.
Step 6. Apply the Sensitivity Label to the SharePoint Site
- Wait for the newly published conditional access and sensitivity label policies to replicate after publishing.
- Select the newly created sensitivity label.
Troubleshooting
If you're just setting this up for the first time, the first thing that will probably trip you up is waiting for replication. Conditional access policies and sensitivity labeling policies can take a considerable amount of time to replicate once published. Microsoft says up to 24 hours. I've never seen it take less than several.
Groups & Sites isn't available > Container labeling hasn't been enabled.
Authentication Context doesn't appear > Wait for replication.
Policy doesn't trigger > Confirm the site actually has the label.
Downloads still work > Verify you're testing from a browser.
Works from one machine but not another > Verify the Named Location.
Final Thoughts
Once you've completed the initial configuration, adding additional protected SharePoint sites becomes extremely simple. Create the site, apply the sensitivity label, and the existing Conditional Access policy will immediately start protecting it. By separating the Conditional Access policy from the individual sites through Authentication Contexts, you've built a solution that's both scalable and easy to maintain.